
Bath
bombs! You must have heard about them before. It seems everyone is
talking about them. For a show I did this past weekend, I made bath
bombs instead of my usual glycerin soaps.
I
don't sell bath products by trade, but I like to make something fun,
which my children will enjoy if I don't sell them all. It's also nice to
schedule a day that doesn't involve crocheting, because when I'm
preparing for a convention, that seems like all I do.
I thought, why not give you a how to on making bath bombs and hopefully you can learn from my mistakes!
Ok, so first things, first, you need a recipe. I based my bath bombs on Hello Glow's No-Fail Coconut Oil Bath Bomb recipe, but I tweaked things here and there as I saw necessary.

Ingredients:
Food Coloring
Tiny Pokemon Toys (What? Don't worry, I'll explain.)
Ok,
so as I see it, part of taking a bath bomb is the experience. You want a
super fizzy bath bomb with a pleasing color and scent. As a bonus, I
like to put a small plastic toy in the bombs. It's a longer lasting
memory and a random toy makes things more fun. haha!

Now don't forget, safety first! I highly recommend wearing a Particulate Respirator when mixing your ingredients and Nitrate Gloves will keep your hands from drying out. While working with all these salts, your hands will dry up.

You will also need:
A Large non-reactive bowl
One Cup measure
1/2 cup measuring cup
A small bowl
Plastic disposable fork (or spork!)
Wire Whisk
Ready to make some fun bath bombs?
Alright here we go!
1.
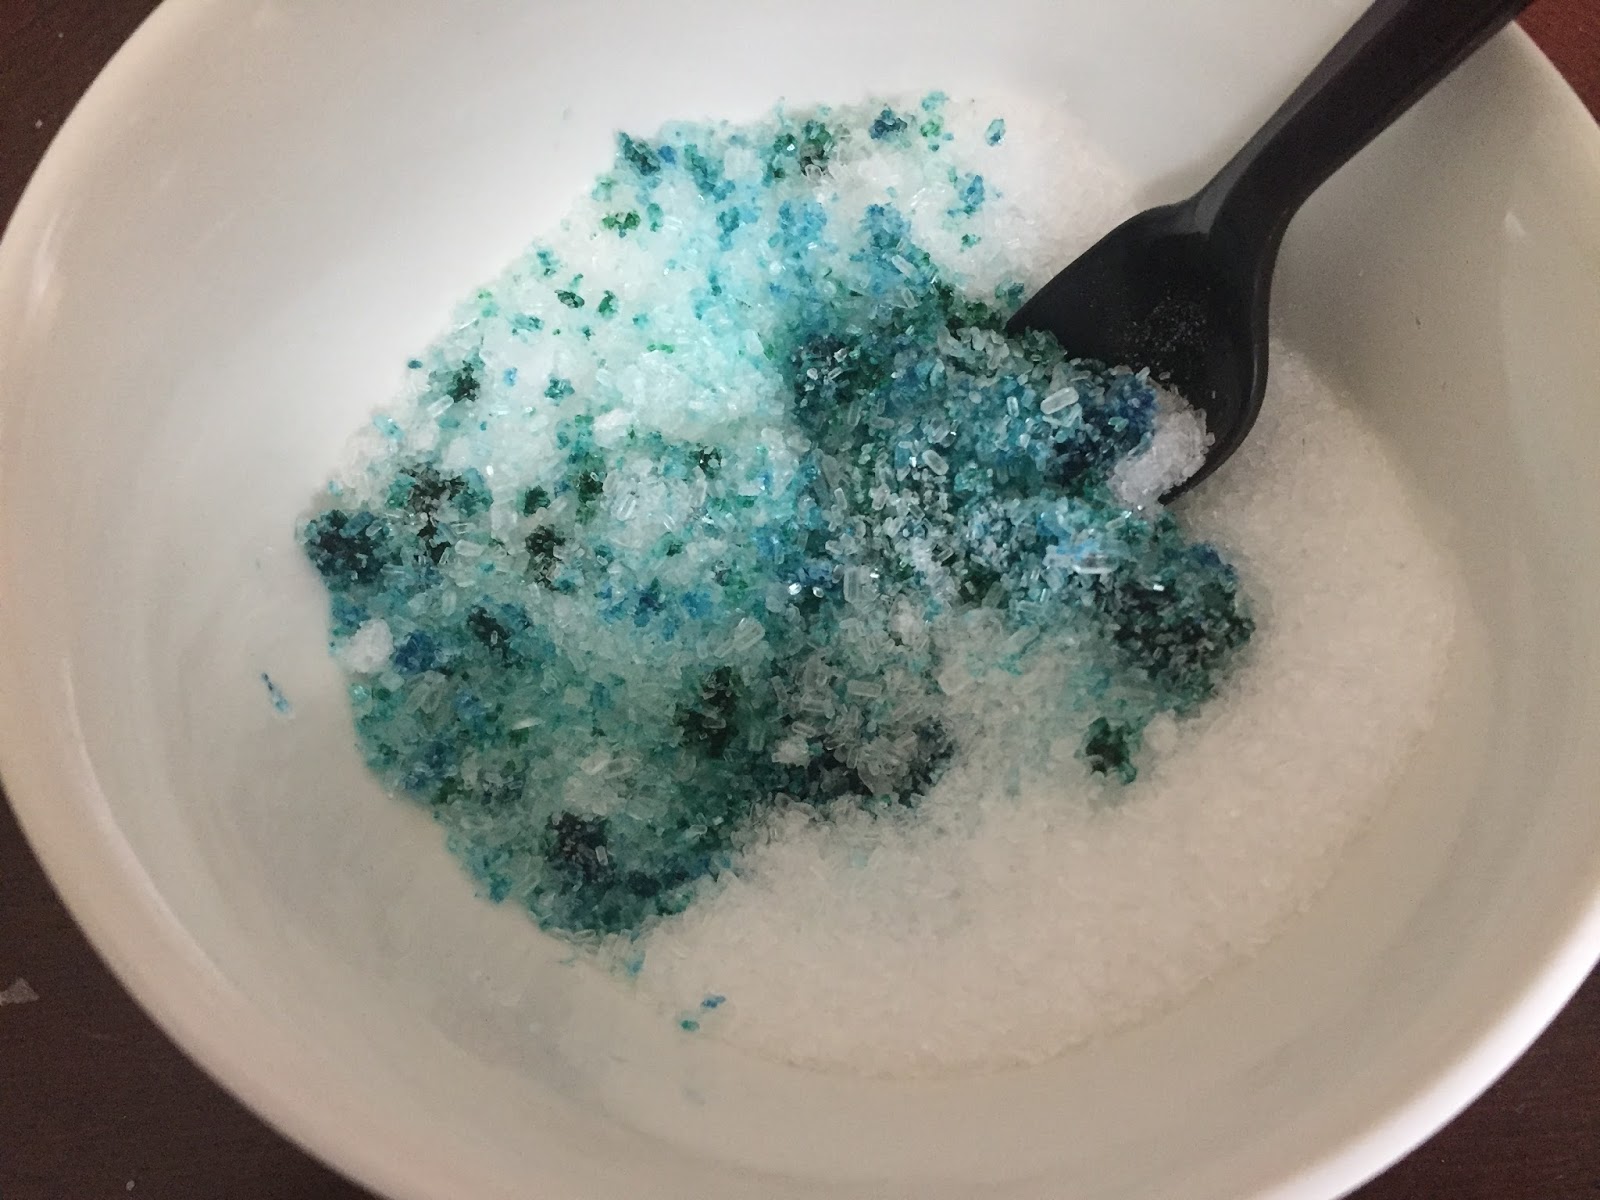
Combine 1/2 cup of Epsom Salts with a few 10-15 drops of food coloring
and 10-30 drops of essential oils. It will smell strongly, but don't
worry we will be mixing this with the other ingredients and it will be
diluted. Set your Epsom Salt mix aside for about 15 minutes.

Why
are you doing this? Well, The biggest reason we have failures in bath
bomb making is moisture. Moisture will make your bombs react before they
are ready. To avoid this, we pre-mix the coloring and fragrance with
the Epsom Salts. Epsom Salts will absorb moisture without making your
bombs react too early.
If you were just making bath salts, you would stop here, let the Epsom Salts dry completely and bottle up your salts.
2.
Now while you're waiting for the Epsom Salt to "cure" let's mix up the
other dry ingredients. You will mix 1 cup of Baking Soda, 1/2 cup of
Citric Acid, and 1/2 cup of Cornstarch. Mix these ingredients thoroughly
with a wire whisk.
Why
Cornstarch? Ok, you don't need cornstarch to make a bath bomb. But it
does slow down the bubbling process just a tad so you extend the
experience. It will also give the water a slightly milky appearance,
which is nice. But if you don't want cornstarch, just leave that out. No
harm at all.
3.
Mix in your Epsom Salts to the other dry ingredients. Mix well. You
will see the color transfer to the other ingredients without the
tell-tale fizz of a failure batch.
4.
Melt approximately 3 tablespoons of coconut oil in a microwave safe
measuring cup. I found 15-20 seconds was enough. The amount of coconut
oil you use will depend on the humidity in the air on the day you are
making bath bombs. I had some mixes act very dry and had to use an extra
tablespoon or two to make my bombs. Again, it really depends on the
weather.
5.
Mix the oil into your dry mix slowly adding more as needed. It's
important to mix this with your hands. The texture will feel like good
snowball making snow. It will pack and hold it's shape nicely.
6.
Taking your bath bomb molds, fill 1/2 of the mold halfway. Place the
plastic toy inside and finish packing. Use your palms to pack the molds.
(Don't be me with sore thumbs) Pack that little ball like it's the end
of the world, but be sure to keep the threads clear. If there is
ingredients trapped in the threads, it will not make a solid bath bomb.
7.
I found I was able to make a total of 10 bath bombs per batch. Once you
finish making bombs, place them in the freezer for 20 minutes. I placed
all of my bombs on a metal baking sheet with sides to keep them from
rolling all over or worst case popping open in my freezer.
8.
Remove your bombs from the freezer, warm the mold with your hands and
separate carefully. You should have a perfect little bath bomb now!
9. Oh
no! Your bathbomb broke! No problem. Let it warm up to room temperature
and crush it back up. You likely need a little more coconut oil, but it
can be repaired. Hooray on only a little waste

10.
I recommend letting your bath bombs set overnight to finish drying.
With a coconut oil based product, this isn't necessary, but I found
letting the tiny bit of moisture from the food coloring evaporate helped
produce a more solid product.
These
balls won't like heat or moisture, so I wrapped mine tightly in plastic
wrap and tied the ends with curling ribbon to keep them dry and help
keep their shape.
I
hope you try making your own surprise bath bombs. If you have any
questions, please contact me. This was so fun and my children are loving
their baths. (I'm enjoying their coconut oil baths which is keeping
itchy winter skin and fly away hair at bay.
PS!
Your bath bombs might make your bathtubs a little slippery. To clean
up, I recommend using a scrub brush and dish soap. Fill your bath with
hot to warm water, just and inch. A quick scrub around and you're
bathtub will be sparkling clean.
No comments:
Post a Comment